TuneMyMusic: Now organising your music library’s easier
View(s):By Mahesh De Andrado
With the growing popularity of streaming services such as Spotify, Apple Music, and Deezer over the last few years, many of us are either ditching keeping local music files on our smart devices, or switching to a hybrid of the two where we have a portion of our music library online, and the rest offline via physical audio files. I fall into the hybrid category; I have a few audiophile quality audio tracks on my phone and the rest in Apple’s lossless audio format.
Before Apple Music became a thing in Sri Lanka, I was a Spotify user. Of course, this meant rather unorthodox methods of getting Spotify to work in Sri Lanka (the use of VPNs, for example). I then decided to test out Deezer, and eventually found myself using Apple Music. There was something about Apple Music that kept me using it, not to mention it was also significantly cheaper than Deezer. So I cancelled my Deezer subscription and made the switch. While I managed to rebuild my music library by adding the songs I listen to most, it would have taken a significant amount of time to double check all my music against my Spotify library and add them to my new Apple Music Library. Then I discovered TuneMyMusic.
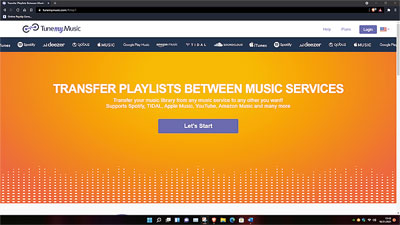
Fig. 01: TuneMyMusic offers a simple, easy-to-use interface
In essence, TuneMyMusic is an online platform to transfer an entire music library, including playlists, between music streaming services. Currently, TuneMyMusic supports transfers to and from Spotify, TIDAL, Apple Music, YouTube Music, Amazon Music, Soundcloud, Deezer, and Qobuz.
Transferring playlists and music from one service to another is literally just four steps. Your first step is to choose the primary streaming service. This will be the service that has all of your music. While there is no need to create an account or log in to TuneMyMusic, you will need to log in to the relevant streaming service. In my case, Spotify.
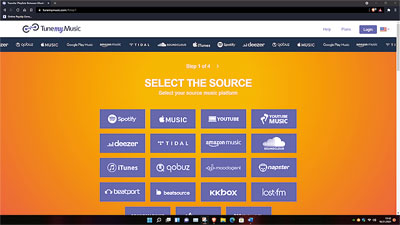
Fig. 02: TuneMyMusic offers a plethora of streaming services to transfer music from
Once you login to the source streaming service, you are presented with a breakdown of playlists that you might want to transfer. A really cool feature of TuneMyMusic is that you can transfer playlists via a URL. This is useful for playlists you haven’t added yet.

Fig. 03: If you login to Spotify, for example, you can choose to load a playlist from your own account or a public playlist via its URL
Bear in mind you can only transfer a total of 1,000 tracks. If your playlist has more than 1,000 songs, or if you have multiple playlists that amount to more than 1,000 songs, you’re going to have to switch to a paid subscription, which can either be 24 USD annually, basically 2 USD per month, or a monthly payment of 4.5 USD. The paid subscription gives you unlimited transfers/conversions, and you can export your library to a text or .CSV file.
In addition to transferring your music library and playlists, TuneMyMusic allows you to sync 2 playlists from two music services, so your music is always updated. If you have a paid subscription, you can have upto 20 automatic syncs.
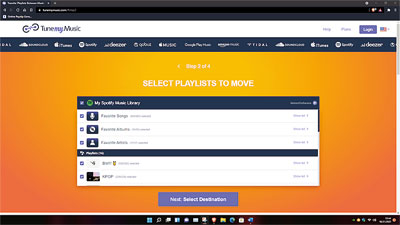
- Fig. 04: Selecting your playlists is by no means a menial task
Once you’ve selected the playlist you want transferred, you need to select the destination service. This is what service the music will be transferred to (Apple Music for me). Again, you will need to log in to the destination service as well. Once logged in, you’re ready to begin the transfer process.
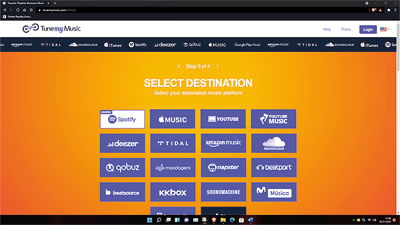
Fig. 05: Select your destination service and login
Depending on how many tracks you have, the transfer can take around 10-15 minutes. If you have any tracks that are not compatible or cannot be transferred, they will be highlighted in red. Once transferred, you’re given a summary of the tracks that were and were not transferred. If you have already logged into TuneMyMusic, you can also choose to sync the selected playlist.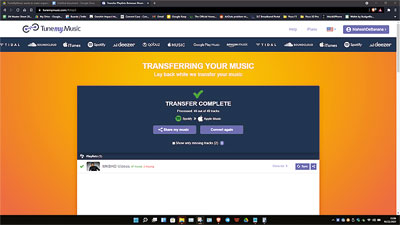
Fig. 06: Congratulations, your transfer is complete
By doing this, if you add/remove songs from the source streaming service, they will be mirrored on the destination as well.
If something is free, there’s usually a catch involved. So for Tune MyMusic, you can only transfer two playlists or a total of 1000 tracks. But in my case, the catch is something that I can completely live with. It supports almost all music streaming services even if it’s not available in your country. There are no annoying pop-up ads or anything of the sort either.
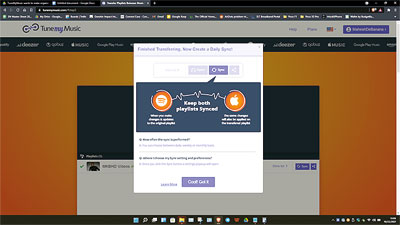
Fig. 07: Once a transfer is done, you can sync the playlist to make sure the music stays updated across both source and destination.
If your playlist has more than 1,000 songs, then yes, you’ll have to opt for a paid subscription, but if it’s less than 1,000, then you’re good to go. The interface is super easy to use and offers a detailed look at what music is in your playlist and what music can and cannot be transferred. So if you’re looking to transfer a playlist from one service to another without hassle, then TuneMyMusic is definitely worth a shot.


